Wednesday, July 29, 2009

Me and my Genie: Making Ordinary Rocks Pretty . . .

While trying to describe to someone how I polish a stone and what lapidary equipment I use, it occurred to me that I should maybe post a blog entry with photos. So here goes.

I don't cut my own slabs. Instead I hit the local gem and mineral shows, buy from ebay rock shops or trade with friends who, like me, periodically clean out their stash to make room for new stuff. I begin with a little slab of whatever material I want to polish - here it's prehnite because I LOVE the color and it's something I've only bought in finished cab form. Since I've not polished prehnite, I'm not familiar with its polishing habits so I'll enjoy a challenge.

Most really and truly lapidary folk have a trim saw to cut their little slabs into the desired shapes and they will cut their stones into either weird shapes to accent the stone's patterns for show displays or into calibrated sizes so that they fit pre-made bezels. Not a fan of calibrated cabs - pesonal preference. However, I'm lazy and I'm cheap and I used what my instructor called the Bowes-O-Matic Trim Saw: a ball peen hammer. Actually, in class I got tired of waiting my turn on the trim saw so I started breaking my slabs with bigger rocks. Anyhoo.

At this point, some people will glue their stone to a short section of dowel rod or even a nail with either Gel Super Glue or green dopping wax stuff. I don't - it's a step I can do without and I prefer to use my fingers.

On my Genie's coarsest grit diamond wheel (80 grit), I start grinding the edges into the shape I want. Occasionally, a stone is too "soft" and if I know it will flake or grind too quickly, I'll start with finer grit to slow down the shaping process. Here I'm taking the edges down to a triangular shape on the diamond 80. (Side note: my Genie has six grinding and polishing wheels: 80, 220, 280, 600, 1200 and 3000 plus two buffing pads that I rarely use.)

Once I have the stone in the general shape I have in mind, I cut a 45* angle edge to start the rounded top leaving a little flat side edge so that a bezel will sit upright at a 90* angle to the base. Personal preference - I like my cabs thicker. I also check the sides and top frequently by holding the stone up to eye level with my thumb so I can see that the top is rounding evenly and I
don't end up with a lop-sided top on the finished cab.

I continue to work the stone evenly by constantly moving it in different directions, switching sides, keeping the motion even and stopping frequently to hold the stone up to eye level for an "evenness" check. At this point, I turn the stone over to the backside and make a small 45* angle at what will be the base. This step will ensure that I have left enough room for a solder joint if and when this stone is bezel set. Back to the top - I keep working the stone until I'm satisfied that it is ready for final polish with no flat places. If I find flat spots, I go back to the previous wheel and work them out.
You can see in this pic above that the back of the stone still has some cutting wheel marks so it will have to be taken back to a coarser grit to polish those out. No one will ever see the back but I'll know it wasn't finished correctly so back to the wheel it will go. Although I feel that my final 3000 wheel is sufficient for my purposes, I do have two buffing pads that I can use for a high polish.

I know that there are a bazillion other lapidary people out there who are more detailed and scientific in their approach to rock polishing, shaping and beyond, but this is the process that works best for my stones and me. I can really get into a groove sometimes and lose myself in the grinding and polishing but the best part is ending up with some spectacular stones and having the satisfaction of creating a piece of jewelry from beginning to end.

Tuesday, July 28, 2009

And again . . .


Trahlyta
They last for such a brief time
I can't resist posting these lovely pictures

Monday, July 27, 2009

I got bored today . . .

. . . so I organized my rolling toolbox full of miscellaneous slabs, dusted off my Genie and polished a few scraps. Now I'm excited to do a little creating.

What we have here: Green Opalite, Montana Agate tongue (my first tongue!), Dendritic Opal, Chinese Writing Stone, Larimar and Holley Blue Agate. (Bad pic - dang)

I'm energized once again and all I did was clean up a bit.

Friday, July 24, 2009

Spiderweb Jasper Pin

Honest, every day I try to create something. Sometimes a big thing and sometimes all I do is rivet a bead onto a piece of scrap. Just "something".

So today I wanted to spend some time with my lapidary equipment and I found a tossed-aside bezel setting that a friend gave me along with a baggie of scrap silver when she decided that she wanted to quit the jewelry and rock biz. I found a piece of jasper that was the same general size as the bezel and I shaped it and ground it and and polished it to fit. The backward way of making jewelry. I've done this several times when a stone just didn't look quite right in the setting and I've really enjoyed the challenge of the backward technique.

Good, huh?

Thursday, July 23, 2009

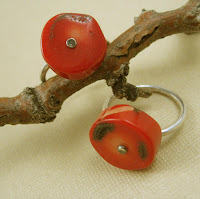
Trying really hard to be inspired right now and having some difficulty - an 'artist's block' maybe. But I think it's important to do something at the bench every day (even if it's cleaning) and this is my 'something' today.

Two coral rings - no more no less.

Monday, July 20, 2009

Extra pieces . . .

Not sure why I'm drawn to this material unless it's the leathery touch or the acid color, like antifreeze, and such great depth. Lovely material, it is.

Had a few pieces left that I had finished last week so my special order customer would have a stone choice and I set this one very simply since the stone was vein-y and 'busier'. It deserved some peace and quiet in its setting, I thought.

Does anyone remember those Brach's candies that were whitish and had bits of colored jellies embedded in them? Like hard white taffy with pieces of translucent petrified jelly. Well, that's what this stone reminds me of with the clearish green places outlined by the white veining. Sounds weird - looks 'way cool.

Saturday, July 18, 2009

Off to Belgium with you!

A special order completed today and packaged to ship to Belgium. The buyer saw one of my rings on etsy and wanted one similar but bigger so I cut and polished three stones (glad I had more of this material on hand!) and she chose the biggest one for her custom ring.

The rough slab material was sold to me as opalite with is translated as a non-gem grade opal. It's the coolest shade of green with marvelous inclusions and veins. Whatever it is, it polishes beautifully and has great depth. Sorta 'green glass-y'.

I think this really turned out nice and the oxidation sets off the bright silver shine. Sweet, if I do say so myself. No, edgy.

Thursday, July 16, 2009

Okay - back to daylilies . . .

I can't help myself. They're here for such a short time and so beautiful when they bloom that I just get all drooly.

So here you are - Real Wind, Pink Sparkler and Hot Toddy.


Tuesday, July 7, 2009

A break from daylilies . . .

I've gotten into this riveting thing lately and can't seem to stop. Something about being able to set a gemstone bead without a bezel and to be able to see the top of the stone instead of stringing wire and crimp beads, perhaps?

The technique is simple enough but I've found that it really takes a torch with a tiny tip and a super-hot flame. And if I showed you how to do it, you'd be doing it to absolutely every gemstone bead in your collection. Forget the crimping and stringing!

These are a few of my popular pieces and right now, I'm completely and totally in love with chalcedony - so that's what you'll see in my shop and the galleries where I sell my work locally.

I try to stay with the cool colors for summer like icy blue and prehnite pale green and clear crystal but these will soon give 'way to the reds and golds and rich browns for Fall. But for now, coolness reigns.

Monday, July 6, 2009

. . . I can't help myself . . .

Prairie Blue Eyes


Little Wart


Puddin


Antique Ruffled Lavender


Tee Tiny

Sunday, July 5, 2009

. . . and more . . .

I just can't get enough. The trick is to plant them in full sun, not too deep, ignore and wait.

Fires of Fuji double


Marse Connell spider

Flaming Poppa

Saturday, July 4, 2009

Daylilies in bloom . . .

I wait all year for my dozens of daylilies to bloom and it's over 'way, 'way too quickly. Since the blooms only last for one day I find myself scheduling trips so I won't miss them in bloom. A terrible addiction, I know, but their fleeting beauty is something I can't risk not seeing. There are worse addictions.

I begged Pat Underwood at Sam Hill Gardens for Sugar Candy and boy! was it worth it! This purple bloom absolutely glows tangerine. I pair it with Bertie Ferris - a small bloom in an orange sherbet color.

Some of these little guys are going to have to be moved to a sunnier location this fall but (this purple one is Trahlyta) it's so hard to know where the good sunlight is going to be when you first move into a new home. I've given some of these little beauties plenty of abuse by moving them last summer and then again in the fall and I can only hope they'll forgive me for moving them one last time. I promise.